In this post I’m going to share my tips and tricks to make neat darts.
In order to sew beautiful darts, there are two mains steps: the marking and the sewing. I’m going to talk you through these two steps in every detail…
But before we start, what is a dart?
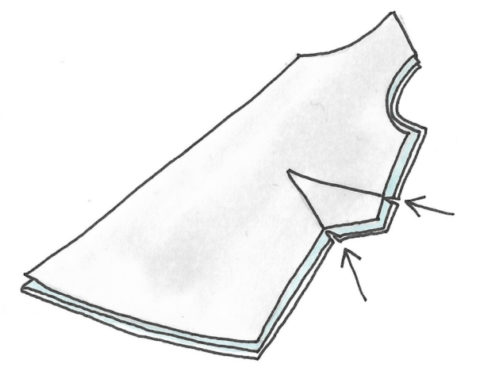
Darts are small pleats in triangle or diamond shapes sewn in garments in order to follow the rounded shapes of the human body. Darts are present in most sewing patterns made for woven fabric, so it is important to know how to sew them. They are often represented like this:

Marking the darts. How to mark the darts on fabric?
I have two methods which I use to mark darts from a sewing pattern to my fabric, and I use one or the other depending on the fabric. There are other techniques, probably more professional, but these two methods work for me and I use them all the time!
We are going to take the example of triangle darts on a top. Beforehand, your fabric would have been folded right side sides together and the pattern would have been pinned on it. Once the pattern piece is cut into the fabric, we keep it pinned to proceed to the marking.
1st method to mark darts: with tailor shalk
For this method, you’ll need:
- a tailor’s shalk (this would also work with an erasable pen)
- pins
- scissors
- a ruler
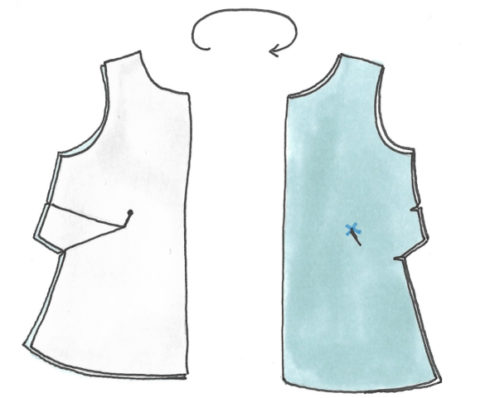
Step 1: first, we are going to do some snips in the fabric (max 5mm) with scissors where the darts start on the side of the pattern piece.
Step 2: then we are going to put a pin through the paper and two layers of fabric where the end of the dart is, turn the whole thing on the other side, and simply draw a cross with the shalk where the pin is. Since the fabric is folded with right sides together, the little cross is on the wrong side and won’t be visible on the garment.
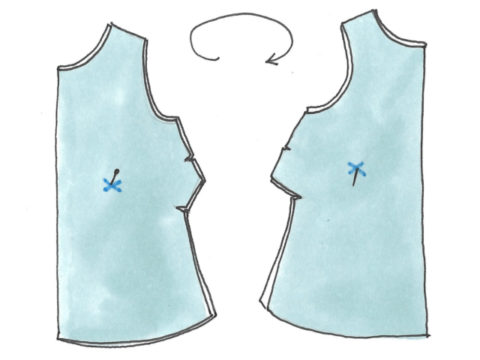
Step 3: in order to mark the opposite dart, we can unpin the pattern and while keeping the fabric folded, we are going to put a pin through the two layers of fabric from where we drew the first cross. This is where we are going to mark a cross, to mark the end of the second dart.
Step 4: now we can unfold the fabric / divide the two layers of fabric, and with a ruler, we are going to draw the darts by joining the snips and the crosses.
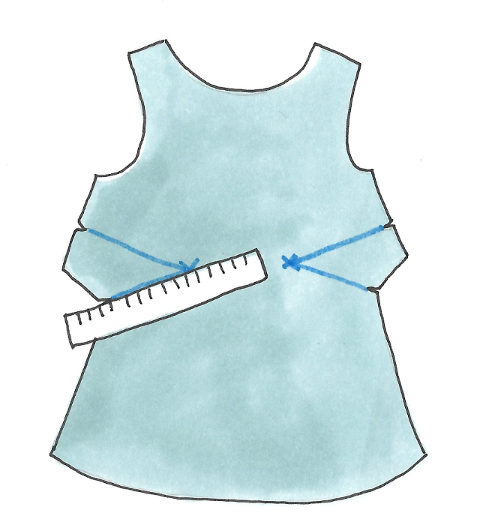
Our darts are now marked with the tailor shalk method.
2nd method to mark darts: with a few stitches
With this method, you will need:
- a needle and a thread with a different colour than your fabric
- pins
- scissors
Step 1: such as on the first method, we are going to do some snips in the fabric (max 5mm) with scissors where the darts start on the side of the pattern piece.

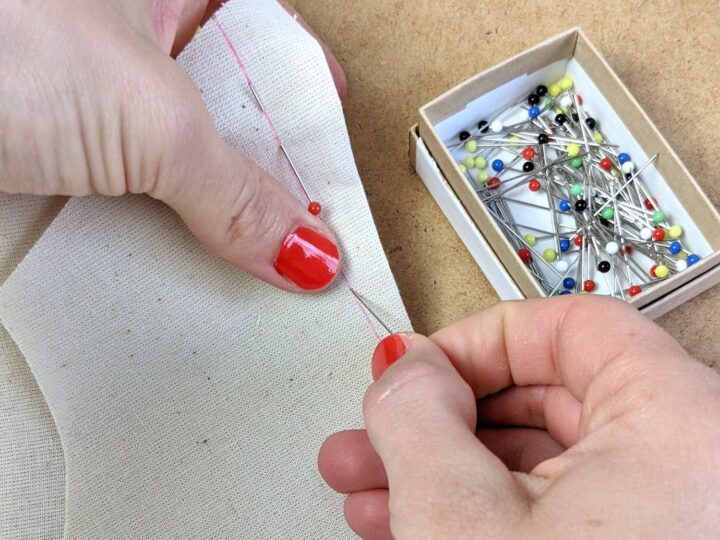
Step 2: then we are going to put a pin through the paper and two layers of fabric where the end of the dart is, and turn the whole thing on the other side. We are going to do a single stitch where the pin is, through one layer only, without knots, and leaving the thread about 1 or 2 cm long. We will repeat this step on the dart lines, in the middle of both lines or at each third of the lines depending on the size of the dart.
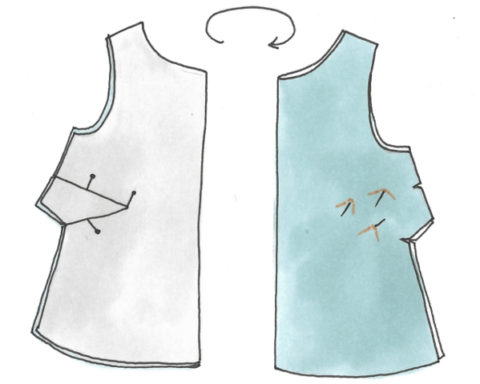
Step 3: we can now remove the pattern piece and while keeping the fabric folded correctly, we are going to do stitches on the opposite layer of the fabric (to mark the opposite dart) using pins where we have already made some stitches.
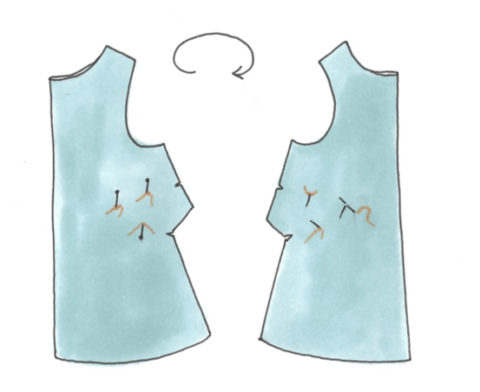
Our darts are now marked thanks to a few stitches.
When should I use the shalk or stitches methods?
On my side, I generally use the shalk method, which is quicker and more efficient in my opinion. I only use the second method, with stitches, when the fabric is not easy to be marked with shalk (the most recent example is with my yellow and black dungarees, where the shalk was useless).
Sewing the darts. How to sew the darts once they have been marked on the fabric?
By manipulating the fabric right side against each other, we are going to fold the fabric while joining the side snips and taking the end of the dart as a reference.
Then, we have to pin this. In order to facilitate the sewing step, I always pin with the dart on the right and the tip of my pins towards the side of the fabric.

Pin the darts, following the lines of the darts marked in shalk or stitches. Once it is pinned, check and adjust one pin by one pin making sure the lines in shalk or the stitches coincide on the two sides of the darts.
Now that the darts is perfectly pinned, we only have to sew it! One more tip to get a perfectly sewn dart: start from the side with a normal stitch length (2.5mm) and secure with a back stitch. Then, when approaching the end of the dart, reduce the stitch length (1mm) and do not finish with a back stitch. Leave the threads long enough to secure with a knot.

The last step is to iron your dart, towards the bottom for most of the tops, and towards the sides for most skirts and trousers, and to remove the threads if you used the stitches method to mark your darts.
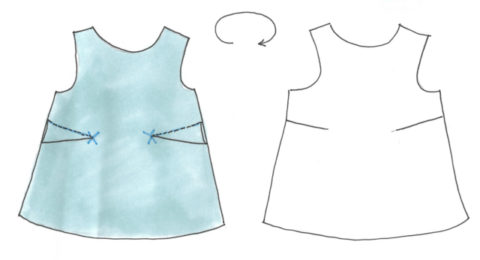
There you go, your darts are now perfectly done! I hope these tips will be useful.
What about you, what are your tips to create perfect darts? Which methods do you prefer?


