Hi everyone! You would like to start sewing clothes but you simply don’t know how to use a sewing pattern and what the steps are? Read this article filled with useful tips and detailed steps to understand how sewing patterns work.
I have a strange personal history with sewing patterns. After a first attempt to use a sewing pattern (which I didn’t understand at all), I decided to sew my garments without pattern because I thought I would be better off without. Basically I cut garment pieces directly onto fabric. I ended up with a few good garments, but it was very time consuming, so I came back to sewing patterns with more determination. When I finally knew how to use them, it was as if a whole new world had opened up for me. So I’m sharing everything I wish someone had told me about sewing patterns.
What is a sewing pattern and why do you need one?
Before explaining how to use a sewing pattern and detailing the steps, if you have no idea what a sewing pattern is, let’s start from here.
What is a sewing pattern?
Simply put, a sewing pattern is a guide to sew a specific garment at a desired size. It includes a set of pieces, drawn flat, to lay out on fabric for cutting. A sewing pattern includes sewing instructions to assemble these pieces together in the right order and following a certain methodology.
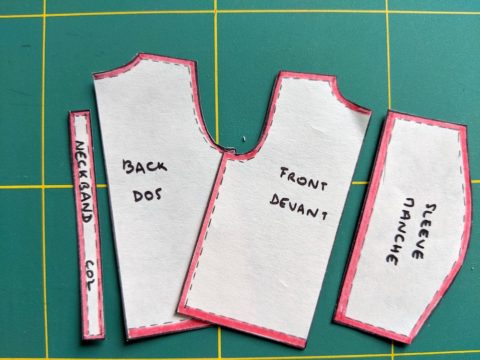
For instance, if you think of a simple t-shirt, it has 1 front, 1 back, 2 sleeves and 1 neck band. So the sewing pattern of that t-shirt will include 4 pieces: the front, the back, the sleeve and the neck band. And it will have a instructions that will tell you to 1. sew the front and back at the shoulders, 2. sew the neckband onto the neckline, 3. sew the head of the sleeves to the bodice, etc.
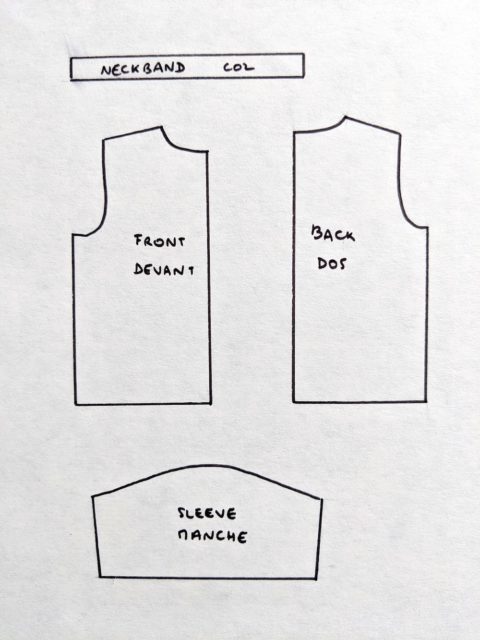
Example of the sewing pattern pieces of a t-shirt
What does a sewing pattern look like?
Sewing patterns generally show the pattern pieces in a way that allows the makers to cut with the fabric folded in 2 layers (for practicality, time and space): for example, you will have 1 sleeve piece to cut twice and you will see 1 half front and 1 half back to cut on the fold. However it is not always the case, for asymmetrical styles for instance. The best thing to do is to follow the pattern instructions, as to how many pieces to cut and how to cut them (see chapter 8).
Sewing patterns come in several sizes, so you will see the pattern pieces in the available sizes on paper. There is a line with a specific style for each size and they are all set in a nested way (placed one inside the other), so that you can recognise which size to cut easily.
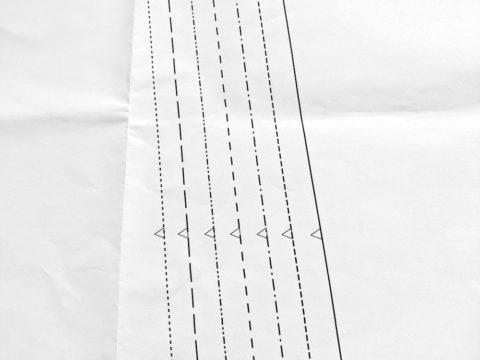
Sizing lines on a sewing pattern
The different sewing pattern formats you can buy
Nowadays, we can find 2 main formats of patterns:
Paper patterns:
this is the traditional type. The pattern is printed on a large piece of paper and the instructions are printed too. Generally, the biggest brands offer the patterns on silk paper (very expensive to print) and younger / independant brands offer the patterns on heavier paper, very much like the one we find in our home printers.
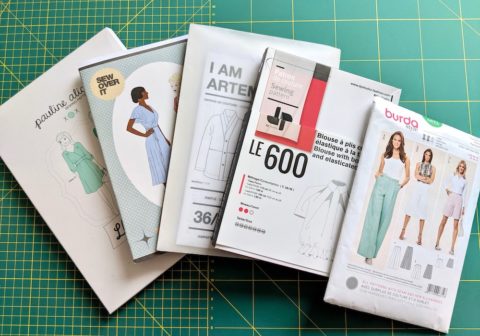
Paper sewing patterns
Digital / PDF patterns:
There are more and more patterns available in PDF format. When you buy a PDF pattern, you can either print it at home on A4/US letter sheets of paper or at a copy shop on A0 sheets. If you print at home, you need to assemble the pages with magic tape which is ok when there are not too many pages, but can be a pain if there are more than 40 pages (in my opinion)…For digital patterns, instructions are also in PDF, and you don’t necessarily have to print them, you can follow them on your device.
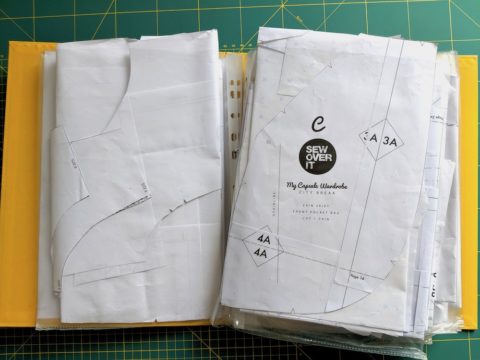
PDF patterns, stored in ring binders
Other types of sewing patterns
Some sewing patterns provide projector files to enable sewists to use their projectors to cut fabric, instead of using paper.
All pattern companies are different and they are not always all paper or all digital. Some offer a paper pattern with PDF instructions. Other offer a PDF pattern with video instructions, etc.
At Camimade Patterns, all our patterns are in PDF format.
Now that you know what a sewing pattern is and the formats it can come in, the question is “where do you start?”.
The different pattern levels
From the beginner ones for those who have never sewn before to the most advanced ones which involves advanced techniques that require some experience, there are patterns for all sewing levels. Check out the pattern description to see what level it corresponds to. Sewing patterns may show the sewing level with a scale or in the description.
Here are the sewing level categories you are likely to see:
- beginner: ideal patterns for complete beginner who have never sewn a garment before. They generally have very simple closures (no zips or buttonholes) and they don’t include intricate seams or details (no bias binding, piping, this sort of things). They might include darts but will explain who to sew one.
- confident beginner: this is a strange category name but there is actually a step between complete beginner and intermediate and it is that one. When you have sewn your first or second garment, you are not a beginner any more. You are more confident to try new things, like zip closures, inserting sleeves, gathering.
- intermediate: at this stage, you have sewn a few garments and even if you don’t know all the sewing technics yet, you don’t feel like a beginner and you can tackle most garments with confidence.
- advanced: intermediate with a lot more experience but still many things to learn! The good thing about garment making is that there are so many different technics, you can always learn new things even if you are at an advanced level. I believe it’s all about confidence and experience.
If you are a beginner, the best thing is to choose a pattern that is suitable for your level of sewing. You don’t want to discourage yourself at the start of your sewing experience!
1. How to use a sewing pattern – step 1: discover the pattern content
It is essential to check the sewing pattern content and read the instructions before doing anything. Each detail of a pattern has its reason to be there. So let’s discover what a pattern is composed of and what you should be careful about when reading a pattern.
The pattern instructions include amongst other things:
- a measurement table with the sizes available
- a finished garment measurement table
You can deduce the ease of the garment from both tables.
- the amount of seam allowances: see paragraph below for more details
- the pattern pieces inventory: list of pattern pieces and how many times to cut each
- cutting plans: see paragraph 8
- the fabric recommandations and required quantities (sometimes calculated per sizes)
- and the list of required notions
The pattern itself includes all the pattern pieces in the available sizes.
What are seam allowances?
Most sewing patterns include seam allowances, and a few don’t. They are added edges to each pattern piece (from 0.5cm to 1.5cm) which enable you to sew the pieces together at this distance while achieving the correct size. Seam allowances serve also as hems at the bottom of different pieces to finish the garment, and in this case they can be higher than 2cm.
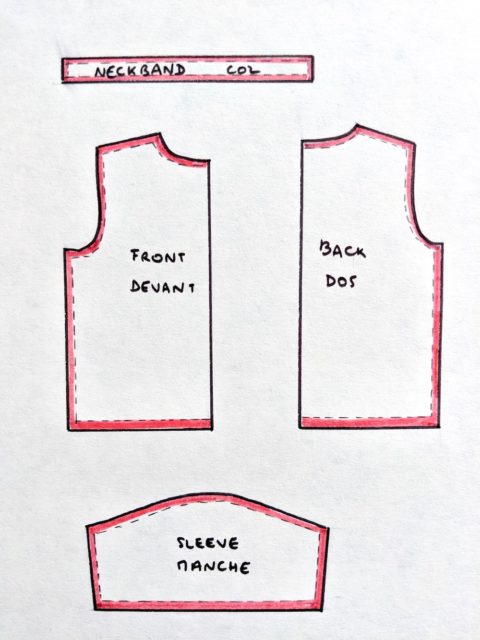
Seam allowances shown in red
When sewing the pieces together, you can simply follow the guide on your sewing machine.
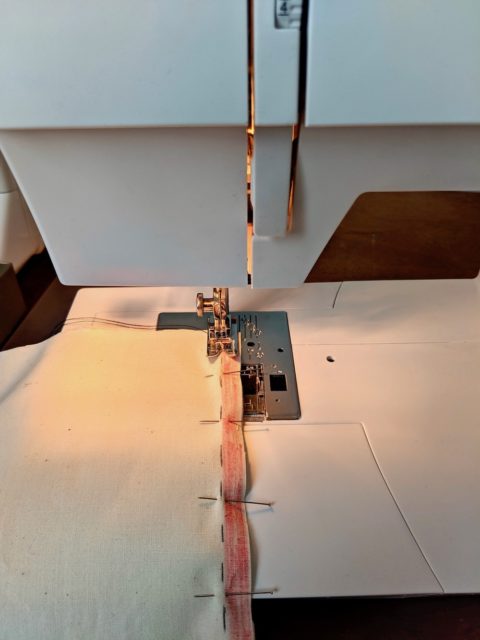
Machine seam allowance guides are on the right of the needle.
Once the garment is sewn, seam allowances are inside the garment (unless they are used as decorative elements). In any case, you need seam allowances to sew a clothes.
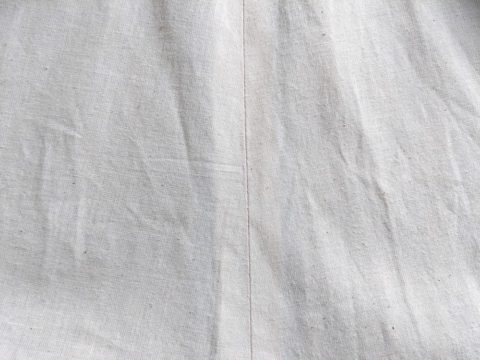
Seam viewed from outside the garment
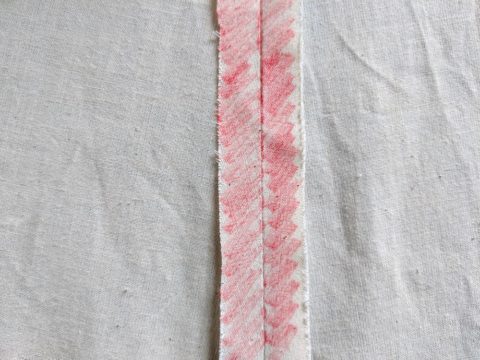
Seam viewed from inside, with seam allowances shown in red on purpose.
Sewing patterns tells you if seam allowances are included or not:
- If they are included, that’s fabulous. No need to do anything special, just use the amount of seam allowances mentionned in the instructions to sew the garment.
- If they are not included, you will have to copy the pattern pieces on a separate piece of paper and add the seam allowances manually, or you could add them by tracing them directly on the fabric around the pattern. Personally I don’t like patterns where seam allowances are not included. They feel like unfinished products with a lot of margin for errors.
2. How to use a sewing pattern – step 2: choose your size
Choosing your size can be the easiest thing if your measurements fall exactly in one size on the measurement table. Or it can be a nightmare if you have your measurements in between sizes, or spread across several sizes of the chart.
I will explain in another article how to choose your size, but as a rule of thumb it’s best to choose the size above if your measurements fall in between sizes, or the bigger size if your measurements are spread across several sizes.
3. How to use a sewing pattern – step 3: gather the required materials
Sometimes the fabric quantities differ according to the size, so now that you have chosen your size, you can buy the fabric and everything else you need to sew the garment.
It can be difficult to choose fabric when you have never done so before. The safest thing to do is to stick to the recommended list of suitable fabrics for the pattern you have chosen. When in the shops, don’t hesitate to ask a member of staff to point you in the right direction. Additionnally, if you have never bought fabric before, remember that fabric rolls come in 2 different widths (approximately 150cm and 115cm). Most patterns will tell you how much you need for these two widths. But if a pattern says you need 2m without saying it is for 150cm or 115cm width, just assume it is for a 150cm width and add more if the fabric you want comes in a 115cm width.
Remember it’s ok to make mistakes with the choice of fabrics, we’ve all done that and still do. Even if it’s disappointing, choosing the wrong type of fabric for a project is what makes you better at choosing fabric!
4. How to use a sewing pattern – step 4*: print the pattern
*For PDF patterns only. Skip this step if you have a paper pattern or a projector!
If you have a PDF pattern, you will have to print it somehow and you have two options:
- Print it from home. Just consider where you live and select the correct document, between A4 and US letter (only for US). The pattern won’t obviously fit on one page, so you will have to stick the pages together.
- Or print it from a copy shop on the biggest format (A0) to avoid sticking small pages together.
I wrote a detailed post on how to print and assemble PDF patterns so you can learn more about this step.
You can also print the instruction guide if you like. Or not! Personally I don’t print it, however I put on my Google drive (you could use Dropbox / iCloud / etc) so that I can always find it from any device when I sew.
5. How to use a sewing pattern – step 5*: copy the pattern in the chosen size
* Optional in most cases, inevitable in other cases.
If you want to keep the original pattern intact, the best is to copy it onto a new piece of paper. Also best if you plan to make modifications, or sew the pattern in different sizes in the future. Let’s say that it allows you to have the choice later.
I have changed my mind about this. Before I was skipping this step to save time and cut the pattern directly. Now, I take the time to copy it first, because I have learned the importance of this step by experience. So I understand this is a personal choice and definitely not a mandatory step.
In some cases, copying a pattern is inevitable:
- When the seam allowances are not included
- When the pattern pieces overlap or when they are printed on both sides of the paper. It is often the case in books and magazines for paper saving purpose.
There are several ways to copy a pattern, and I will add a detailed post about this in the future.
6. How to use a sewing pattern – step 6*: pattern modifications
Without detailing how to make pattern modifications (because that would make this article very very long), now is a good time in the process to ask yourself if you need to make some modifications on the pattern. Modifications can be as simple as lengthening or shortening a pattern piece to better suit your body, but they can be more complicated like making small/full adjustments (SBA / FBA), sway back adjustment, square shoulder adjustment, etc.
It’s best to make modifications after copying the pattern on a new piece of paper as explained in the previous step. This allows you to keep the original pattern unmodified and look back on your modifications more clearly.
7. How to use a sewing pattern – step 7: cut the pattern
Now that you have chosen your size and if applicable, made modifications, it’s time to cut the pattern. Remember to cut with paper scissors (fabric scissors should be solely used for fabric).
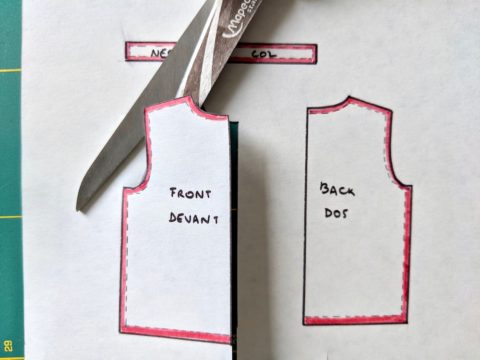
8. How to use a sewing pattern – step 8: cut the fabric
After cutting the paper pattern, the next step is to cut the fabric. Finally! One step closer to have a sewn garment! Most sewing patterns include fabric cutting plans or layouts, so you can simply follow these plans. For most patterns you have to cut with the fabric folded in half, so cutting layouts show the fold and selvedges of the fabric as references, to better visualise where each piece goes.
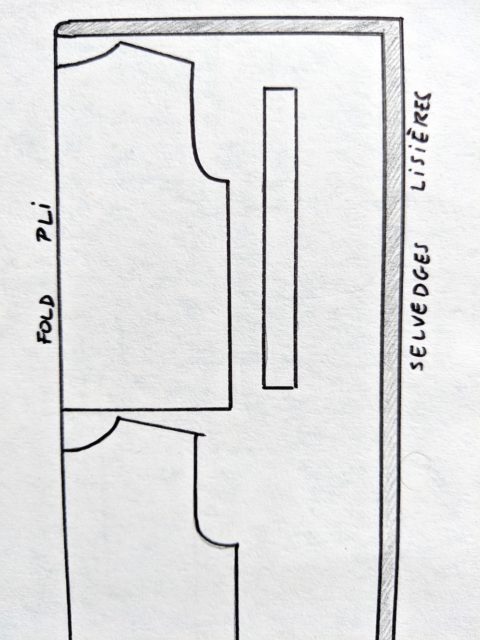
Cutting layout
To fold the fabric in half, fold it lengthwise and right sides together*, putting the selvedges (edges of the fabric) together.
A fabric has a right side and a wrong side: the right side is the side that will show outside the garment, the wrong side will be inside. “Right sides together” means that you need to place the right side of the fabric facing itself.
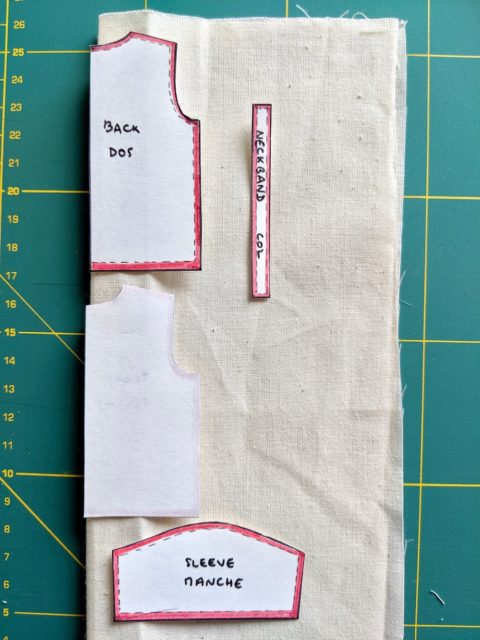
Folded fabric with pattern pieces on top
The fabric doesn’t always have to be folded in half though:
- Some pieces require to be cut just once so you don’t need to fold the fabric in half;
- Some pieces have to be cut on the bias of the fabric (which means diagonally);
- When the fabric is very thin or unstable, it’s better to cut on one layer to have more visibility on what you cut;
- In order to save fabric or if you want to make fabric print matching, it is better to cut some pieces on one layer (being careful to turn the piece upside down to cut its double).
Once you know where to lay out each pattern piece on the fabric, you can pin them in place and cut around them (exactly at the edge of the pattern). Cut with fabric scissors. Another way to cut fabric is to stabilise the pattern pieces with weights on the fabric and to cut with a rotary cutter, above a cutting mat. I am preparing another article to give you more tips on how to cut fabrics.
Before removing the pins/weights, don’t forget to:
- Snip the edges of fabric to mark the notches as shown on the pattern (those little triangles or bars located on the edges of the pattern pieces), ends of fold lines and centre lines. A few millimeters snips will do.
- Mark the darts / dots / buttonholes / button placements / etc with a tailor chalk or an erasable pen. This is the reason why we fold the fabric with right sides together.
9. How to use a sewing pattern – step 9: follow the instructions
As my father says, “a project that is well prepared is 50% done”. So once you have gone through the previous 8 steps of preparation, you are half way through! Well done! It is really worth investing the time in these initial steps to increase your chances of a successful handmade garment.
Now you can simply follow the sewing instructions from the instruction guide and enjoy the sewing process…Sewing patterns generally include drawings, pictures or detailed diagrams to illustrate each step.
Conclusion
I am aware there is a lot to digest in this article but I hope these detailed steps give you the keys to understand how to use sewing patterns.
If you have any question about sewing patterns, please leave a comment below, I would love to help!


