5 tips to sew your own wedding dress
Today I am sharing my tips to sew your own wedding dress. It's a subject I know quite well because I have made my own wedding dress in 2019! Since then, I have been able to step back and reflect on a few tips I would have liked to know before starting this complex and intense project. Because I'm not going to lie, it gave me a hard time!! But if like me it's a project that is important to you and you would like to carry it out without hassle, my 5 tips to sew your own wedding gown will be useful to you.
1. Try on wedding dresses
It is very important to project yourself in your future wedding dress, but when you decide to make it yourself, you can only try it on mid-way or at the very end, in its finished state. So before deciding which design to sew, and even before sewing, make some appointments to try on a few dresses in bridal stores. But not only! Also try on non-wedding dresses.
Source of inspiration
First of all, seeing finished wedding dresses on yourself can give you an idea of the designs you like. Do you prefer a dress with sleeves, a strapless dress, a voluminous dress or a dress with a tail? Some of you might already know precisely what they want, but it was not my case, and trying on some dresses really helped me. Here are a few dresses that inspired my design :
I liked the two layers of the bodice and how the transparent layer highlights the opaque neckline.
I liked the sleeves and back of that one.
Phase of observation
Take this opportunity to observe the details, shapes and volumes you like. Look at the fabrics used and what they do to the dress. Take a lot of pictures and write down what you like. Don't hesitate to ask the sales staff what is this or that fabric.
Have fun !
Don't forget to have fun! Try on dresses that you wouldn't be able to sew for yourself (just like if you were going to buy one)! Just be careful not to have a crush on the wedding dress that you would never be able to sew... No you will not be able to reproduce the exact same designer dress that you tried on. But you could use it for inspiration.
I tried this princess like dress to make my mum happy but it was not really my style, and I knew I would never sew a dress like that.
2. Choose your wedding dress design
Make a Pinterest board
If you haven't started your wedding dress Pinterest board years before your proposal, it's time to do it. First of all, save all the pins you like, and then only keep a limited number of inspirations in order to keep a coherence and not get lost with too many ideas. I found it was a very useful tool to keep all my inspirations in one place and to come back to it easily when I was starting to get lost. Here is my Pinterest board of inspirations for my handmade wedding dress.
Wedding dress patterns
If you are not planning to make your own pattern for your wedding dress, you will have to buy one or several patterns. Therefore, look for the available patterns from now on too. For example, you could visit The Fold Line which is a great pattern database and shop with a lot of available patterns. Just like when you tried on dresses, don't limit yourself to bridal patterns which are very few anyway. It is above all the fabric that makes the wedding gown, so have a look at all the dress patterns: happy browsing! This step can be like a cold shower, because some pattern pictures can be unappealing, or you can simply find it difficult to project yourself with that style... But trust yourself, and don't pay too much attention to the pictures (much easier said than done I know!): instead look at the line drawings (black and white drawing of the garment), which are neutral in terms of style.
Wedding dress design
Now that you had fun trying on wedding gowns, that you have gathered your inspirations on Pinterest and you have discovered what patterns are available out there, you should know a bit more what you want to / can make. It's time to take a pen and draw your dream wedding dress! It's not a big deal if you don't know how to draw, the idea is not to have the best drawing but to be able to visualise the details of the dress. Draw one, two, three, as many dresses as you want, varying the details that you like: for instance, draw the same dress with balloon sleeves, and then with bell sleeves. This will allow you to decide which one you think looks best.
Because at the end, it is important to stop and decide on the design! Changing the design while you sew can happen, but it's best to avoid. It's simply very exhausting to change your mind all the time. (I changed design twice during the making of my wedding dress so I know what I am talking about...). Decide every detail now: the length, how it will close, the type of neckline, the type of bodice and sleeves, etc.
Here is a drawing of the second design that has not made it to the end of the project:
3. Choose your wedding dress fabric
Which fabric to choose?
The choice of fabric goes hand in hand with the choice of design. As I said before, it's the fabric that makes the shape and drape of the dress. A silk muslin has totally different properties than a tulle. Trying on dresses in the first place helps a lot because you can touch and observe how different fabrics behave, what their weight is like, etc. Here are a few fabrics used for bridal dressmaking and what they can be used for:
- silk satin: with a bright right side and mat wrong side, it is more or less opaque, and can come in different weights (duchess satin can be quite heavy for instance) and it has more or less drape depending on its weight. It can be used for the whole dress on its own or as a lining behind a see through layer of silk muslin. This is what I did for my own wedding dress.
- silk muslin/voile: light weight, floaty and see through, silk muslin is very flowing. It can be used for its transparency, with a lining for the bust and skirt, or without lining for the back or sleeves for instance.
- tulle: it is see through and although lightweight, it creates great volumes especially with several layers. It can be used for the shell of the bodice, on which you could add embroidery or appliques. And it is often used for the skirt itself or petticoat to create volume.
- silk organza: it is see through, rigid and quite mat. It could be used to make statement sleeves or voluminous bows. It can also be used as an interlining on the bust, to bring rigidity where the main fabric would be too loose. This is what I have done, and I also cut it into bias binding to finish some of my internal seams.
But where to start?
I would advice to go at least twice in a fabric shop to buy your wedding dress fabric: a first time to discover the fabrics available, ask questions to the staff and ask for samples of fabrics you like if that's possible. This will help you refine your wedding dress design. And a second visit to the shop will be necessary to purchase the final fabric once you have decided on the design and calculated the yardage. Before the salesperson cut the fabric, ask for it to be unwinded to check if there are any stains or imperfections! Finally, don't forget the haberdashery.
Which yardage?
If you have a pattern already, check what yardage is necessary. If you are making your own pattern, ideally have your pattern ready and make a fake cutting plan on the floor, positioning the pieces on a width of 1.45m. Always add a bit more in the calculation just in case. And if you haven't finished your pattern (which was my case) you will have to calculate roughly. Remember to account for all the layers in the calculations (two skirt layers equals twice as much fabric).
Pre-wash your wedding dress fabric?
This is a question I have asked myself. In sewing, we often repeat that it's important to pre-wash the fabric before sewing to pre-shrink the fabric and avoid disappointment once the handmade garment is sewn. However, how does that apply to delicate wedding dress fabrics, which obviously don't go into the washing machine? In the fabric shop where I bought my wedding dress fabric, the sales person told me that [yes for sure] I had to pre-wash my fabric at the dry cleaner. So I visited a few dry cleaners to see what could be done, and none of them understood why I wanted to pre-wash my fabric which didn't have a single stain...only one dry cleaner had agreed to pre-wash my 12m of silk fabric for £150. In the end I decided to not go for the dry cleaning for the following reasons:
- First of all, the fabric didn't have a single stain...
- Then, there was no reason why I would have to dry clean my handmade dress before the wedding. I would do everything to keep it clean: wash my hands, clean my sewing tools (cutting table, desk, scissors) before cutting and sewing, and try on the dress a limited number of times without makeup.
- Also, I was going to press the fabric before cutting it with just a bit of steam and at low temperature in order to do what the pre-wash does, which is to pre-shrink the fabric. Before doing so, I tested my iron settings on small fabric samples!!
- And finally, there was the financial aspect...which had an initial impact in the choice of making my own wedding dress.
I don't know if it was a wise choice, but it worked out fine for me, so no regrets!
4. Learn new sewing techniques
Sewing your own wedding dress can be a bit technical, as you can imagine. But don't panic. Instead, analyse, find out what are the different technics you need in order to make this dress happen. Making a bustier / strapless dress? Sewing delicate fabrics? French seams? Embroidery involved? Sewing a fabric with beads or sequins? Rolled hem?
Make a list of everything that awaits and note what you know or don't know yet. Some technics can be easily learnt via Youtube tutorials or blog articles, but some are a bit more advanced and would require a paid lesson. Books are also a great source of knowledge in order to sew your own wedding dress, do not neglect a visit to the book shop!
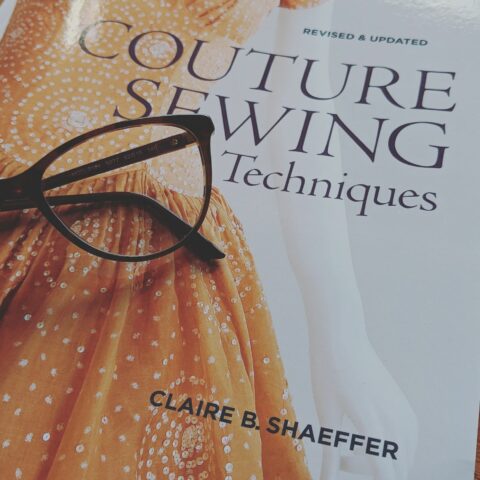
Personally, I have learnt so many things I didn't know before sewing my own wedding dress, only thanks to free content on Youtube and sewing blogs. I didn't take any paid courses but I would have if I had had to make a bustier dress for instance. As for books, the following ones was very useful for couture finishes:
However, we learn even more while making, which brings me to the next tip.
5. Sew a few copies of your dress
It is true, I've learnt so much more while sewing than while reading books and watching tutorials. First of all by sewing toiles (drafts of the final garment), and then by practicing on fabric samples.
Test the fit
Such as for any garment, sewing your own wedding dress requires at least one toile. And it's the bare minimum! I have sewn at least 4 toiles before sewing my wedding dress in the final fabric. In my case, it's mostly because I changed design twice during the project...at the end of the day, I am happy with the final dress but during the project, I didn't know what I was doing. Until the end, I didn't know which length I wanted to cut, so as I said in tip number 3, decide on your design as early as possible and stick to it.
Additionally, don't necessarily sew the entire dress with beautiful finishes for each toile. Use toiles to do fittings, see how the fabric hangs, and adjust the pattern. For instance, you could do several toiles of the top of the dress without making the skirt just to see how the top fits. For my toiles, I used similar fabrics in weight to the final fabrics, but in polyester, because it is a lot less expensive. Making toiles obviously requires more fabric than the final dress fabric (account this in your budget)!
Here I had made a complete toile of my first wedding dress design, sleeveless with an open and loose back.
Practice on fabric samples
In order to practice the finishings, rolled hem, bias binding with delicate fabrics, etc, use samples of your final fabric. Test different machine settings, try different techniques (sewing hand or by machine).
I am sure that if I had sewn my wedding dress a 5th time, it would have been more beautiful and better finished. But the idea is not to hate sewing afterwards, so it's important to stop and accept the small imperfections (that only you can see) and that the timing is over. Handmade clothes are imperfect and beautiful that way. You will have understood, sewing your own wedding dress requires a lot of patience and dedication. But if it's important to you, go all the way, you will not regret it.
I hope this article has given you some useful keys to carry out your wedding dress project. If you plan on using delicate fabrics, why not check out my tips to sew delicate fabrics?